How to Build a Cabin Kit: Step-by-Step for First-Time Builders
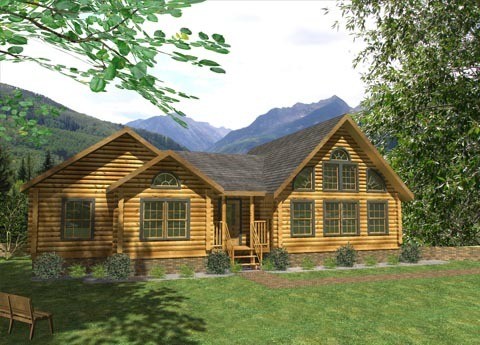
Building your own cabin is one of the most rewarding things a person can do with their own two hands. And a cabin kit makes it more achievable than most people expect — even for first-timers who have never swung a framing hammer.
This guide walks you through every phase of a cabin kit build, from choosing your site to receiving your certificate of occupancy. It's written for the person who's excited but nervous — who wants a realistic picture of what lies ahead, not a glossy sales brochure.
The short version: you can do this. Thousands of first-time builders have assembled Fireside Cabin Kits without a general contractor. The key is preparation, patience, and knowing when to call for help.
Before you begin: Familiarize yourself with our How It Works page for an overview of the kit purchasing process, and visit our Financing page if you need help funding your project.
Choose Your Site
Before any paperwork, walk your land. Find the spot that balances sun exposure, drainage, views, and access. Avoid natural drainage paths (you don't want your cabin floor to flood), and look for a reasonably flat building pad — even a mild slope is workable, but it affects your foundation cost. Think about where your driveway will connect, how emergency vehicles could access the property, and whether you're close enough to utilities if you want grid connections.
Get Your Permits
This is the step most first-timers underestimate. Contact your county planning and zoning department before you order a kit. You'll need a building permit at minimum; septic permits and well permits are separate if you're not connecting to municipal systems. Fireside kits ship with stamped engineering drawings that satisfy most county permit requirements. Timeline: permit approval can take 2 weeks in rural counties or 3–6 months in more regulated areas. Apply early.
Prep the Site
With permits in hand, it's time to prep. This usually means clearing trees and vegetation from the building footprint (plus 15–20 feet around it for access), rough-grading the pad, installing a temporary construction entrance if needed, and addressing any drainage issues. If you're having foundation work done by a contractor, they'll handle final grade. If you're a DIYer, rent a skid steer for a weekend — it'll save you days of hand work.
Pour the Foundation
The three most common foundation types for cabin kits are concrete slab, concrete piers (post-and-beam), and perimeter wall or crawl space. Most DIYers hire out the foundation — it's the one part of the build where precision is non-negotiable. A foundation that's not level or square will make every subsequent step harder. Budget 2–4 weeks for foundation work including cure time before you can start raising logs.
Accept Kit Delivery
Your kit ships on a flatbed truck. Before delivery day, make sure your access road can handle a large commercial vehicle (typically 65–80 feet long). Clear a staging area near the build site — you'll need space to unload, sort, and store materials. When the truck arrives, do a full inventory against the packing list before the driver leaves. Missing components are rare but happen; your Fireside support contact can expedite replacements.
Raise the Walls
This is the moment everything comes together — and it's genuinely one of the best days in a builder's life. Every log or timber in your kit is pre-cut and numbered. Follow the assembly manual sequence: sill plates first, then each wall course in order, then the ridge beam and roof structure. A crew of 4–6 can have a 2-bedroom kit fully weathered-in (walls up, roof on, windows and doors set) in 2–3 weekends. You don't need to be a contractor — you need to be organized, careful, and willing to follow directions.
Rough-In Utilities
Once the shell is up, electricians and plumbers run their rough-in work before walls are closed. Electrical service entrance, panel, and all wiring to outlets, fixtures, and appliances; plumbing supply lines and drain/waste/vent stack; HVAC ductwork or mini-split line sets. This is typically the phase where most DIYers hire licensed trades — most counties require licensed work for electrical and plumbing to pass inspection.
Insulate and Close Walls
With rough-in inspections passed, it's time to insulate. For cabin kits, spray foam at the rim joists and around penetrations, batt insulation in the walls and ceiling cavities, and a continuous vapor barrier are standard. Then drywall (or log-look paneling for an authentic interior) goes up over the insulation. This phase transforms the inside from a construction site to something that looks like a home.
Finish the Interior
Flooring, cabinetry, countertops, fixtures, interior doors, trim, and paint — this is the phase that takes the longest and where the most decisions happen. Kitchens and bathrooms drive cost more than anything else. If you're on a budget, keep fixtures simple and put money into flooring — it's the first thing people notice. Cabinets are a great place for DIY savings if you're handy with a saw.
Pass Final Inspection
When the build is complete, your county inspector will do a final walkthrough covering structural, electrical, plumbing, and egress. Pass, and you'll receive a certificate of occupancy — the document that makes your cabin legally habitable and insurable. If anything needs correction, it's almost always minor at this stage. Congratulations: you built a cabin.
Ready to see the process in detail?
Our How It Works page breaks down the complete ordering, delivery, and support process — from your first question to final assembly.
See How It WorksHow Long Does It Take?
From permit application to move-in, most 2-bedroom Fireside kit builds take 6–12 months. Here's a rough timeline:
- Permit application and approval: 2–12 weeks
- Site prep: 1–2 weeks
- Foundation: 2–4 weeks (including cure time)
- Kit delivery and staging: 1–2 days
- Shell assembly (DIY crew): 2–4 weekends
- Utility rough-ins: 2–4 weeks
- Interior finishing: 4–12 weeks
- Final inspection: 1–2 weeks
The biggest wildcard is permitting. Start your permit application as soon as you've confirmed your land and selected your kit — don't wait until you're ready to break ground.
Do I Need Construction Experience?
No — but some basic comfort with tools helps. If you've built a deck, remodeled a room, or done framing work, you're overqualified for the shell assembly phase. If you've never held a drill, our assembly manual and support team will get you there.
The most important skills for a cabin kit build aren't technical — they're organizational: reading plans carefully, checking measurements twice, and keeping your crew working safely and in sequence. The logs do the heavy lifting (literally); your job is following the system.
You're Not Alone in This
Every Fireside kit comes with builder support by phone and video call throughout your project. Our team has helped hundreds of first-time builders through every phase — site prep questions, permit challenges, assembly hiccups, and everything in between. We're in your corner from order day to occupancy.
Find your kit and start planning your build.
Download our free planning guide for a complete pre-build checklist, then review financing options and browse the kit lineup with a real budget in mind.